Tuesday, September 29, 2009
Monday, September 28, 2009
Monday, September 14, 2009
Sunday, September 13, 2009
Tuesday, September 8, 2009
L I N E S - خطوط

ALPHABET OF LINES
Each line on a technical drawing has a definite meaning and is draw in a certain way.
The line conventions recommended by the American National Standards Institute (ANSI) are used in the following figure, together with illustrations showing various applications.
Two widths of lines are recommended for use on drawings.
All lines should be clean-cut, dark, uniform throughout the drawing, and properly spaced for legible reproduction by all commonly used methods.
The contrast between the two widths of lines should be distinct. Pencil leads should be hard enough to prevent smudging, but soft enough to produce dense black lines so necessary for quality reproduction.
Three weights of lines may improve the appearance and legibility of the drawing.
The "thin lines" may be made in two widths--regular thin lines for hidden lines and stitch lines and a somewhat thinner version for other secondary lines such as center lines, extension lines, dimension lines, leaders, section lines, phantom lines, and long-brake lines.
For the "thick lines"--visible, cutting plane, and short break--use a relatively soft lead such as F or H.
All thin lines should be made with a sharp medium-grade lead such as H or 2H.
All lines (except construction lines) must be sharp and dark.
Make construction lines with a sharp 3H or 4H lead so thin that they barely can be seen at arm's length and need not be erased.
Three weights of lines in many illustrations and drawings are used for increased legibility.
In the above figure, the ideal lengths of all dashes are indicated. It would be well to measure the first few hidden dashes and center-line dashes you make, and then thereafter to estimate the lengths carefully by eye.
Saturday, September 5, 2009
Assignment 1 / Lettering and Title Block
INTRODUCTION
Apply into your assignment points as described in the lecture. Set of title block need to be drawn in your A3 paper. Techniques of lettering, line drawings and dimensioning should clearly demonstrate.
Specific submission requirements of your first assignment will be discussed in much more detail during your tutorials and lecture. You are expected to demonstrate your commitment and some level of professionalism (neat, complete, use all the required apparatus) in your submission.
WEEKLY TASKS & TOPICS COVERED
▐WEEK 2:
First Lecture: an introduction to Engineering Drawing: Overview + assignment 1
□ Drawing Apparatus.
□ Lettering, title block and line drawings.
□ Lecturer will be going around for you to ask questions while doing your work.
□ Schedule your time to complete the exercise on time (due at the end of the session)
▐WEEK 2: Next class
□ Bring all drawing equipment with I piece of A3 with title complete block.
□ Take down all comments given from the previous exercise in order to improve in your next assignment.
SUBMISSION & FORMAT
Submission: Week 2, 4 .30pm sharp, in studio building 59.
- A3’s Landscape with title block
- Drawings need to be neat and complete
- Handed assignment must be completed with all particular i.e. Name, title, date, ID.No, Sheet No and Department

Tuesday, September 1, 2009
Exercise 1
FREE HAND SKETCHING
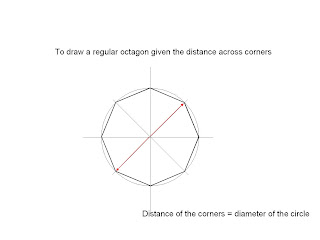
Apply into your exercise points as described in the lecture. Using A3 paper, sketch basic geomatrical shape i.e. Triangle, Square, Rectangle, pentagon, hexagon, Octagon, circle and Ellipse. Line sketch should be shown sharp and consistant.
Specific submission requirements of your first assignment will be discussed in much more detail during your tutorials and lecture. You are expected to demonstrate your commitment and some level of professionalism (neat, complete, use all the required apparatus) in your submission.
Subscribe to:
Posts (Atom)


